Evaluation
TIME LAPSE
This section of the project took the most amount of time due to the amount of times i had to do over the whole shoot.
my idea for the time lapse was to show ice melting however i wanted to make it a little more interesting by adding dye to the ice because if it came out right it would show the dye running through the ice as it melts. as a bonus it also shows the dye running into the water at the bottom of the plate which could be another crop to show a different change over time.
this particular time lapse idea took 3 tries, what I've learnt from this is that even the simplest ideas can take a long period of time! the first try the camera fell halfway and i only realised once it was too late. the second try failed because the lighting was too dramatic in its changes. this also showed how the tiniest things can change or ruin a whole time lapse for example lighting, perspective or just a small bump on the screen.
PINHOLE
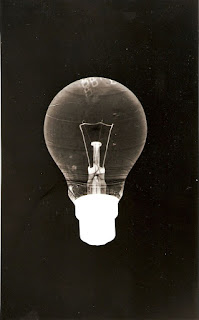
This was one of the most difficult because of how intricate the details where of getting the camera to work correctly, because it wasn't a camera it was instead an energy drink can that we added light sensitive paper and poked a hole in the middle to let the right amount in. if the hole was too big too much light would be let in and you'd only find out when the paper was processed in the darkroom after 3 months.
this is where the can was placed;


Unfortunately the paper did not develop successfully and the image was just white, this could be because the hole in the can was too big or the fact that the can was wet.
ADOBE AFTER EFFECTS
Unfortunately i cant show my work for this section of the project because my computer in the lab crashed and deleted the file in which i created, however i did learn a lot in this particular section we learnt how to create moving images with the programme. luckily we had a step by step method to follow so it wasn't too difficult to learn however because of a slow computer i was often behind waiting for it to load. this was useful because it would further our understanding of the subject and also showed me how some short films can be created.
STOP MOTION
This section was very interesting to me mainly because we got to watch a few cinematic short film and also showed me how they can be created with a burst of photos, this ties in with GIFs. I particularly found this section so impressive because i want to go into film and it furthered my knowledge on how some cinematic shots can be made and added to really boost the production of a film.
3D Work Evaluation
At the begging of this section of our course i had a very clear idea of what I wanted to do for the 3D project, this is because I had wanted to do something like it for quite a while. Whilst a fair majority of the class decided to do collages, which is a good example of what 3D photography is, I wanted to push myself a bit further to show my skills. However it did not go as planned.
For the planning side of the project I decided to sketch out my idea instead of explaining because I had it so clear I couldn't find the right words in which to use, here is the sketch I came up with;

As you can see the overall idea is that the subject is dissolving away into the corner of the page, linking back to the idea of collages, I wanted to cut out pieces of the original photo and use those as the pieces that where dissolving and this would also link to the 3D idea and it would also work for both digital and practical pieces for the project.
However I may have aimed a little too high as I find the specific mask in mind for the shoot or it was too expensive.Instead of using a whole new photo I used a photo i took from the high key photography project because the subjects poses and the well balanced contrasts made the images an interesting choice to wi
I also had a lot of trouble during the digital side as it was taking far too long to cut out exact pieces from the photo and I eventually decided to draw in lines and use an effector for the piece alike above however the memory stick i used was not ejected properly and the final piece was deleted. The next piece I re tried never came out the same way in which was planned so they where trashed before finishing, this showed to me that digital isn't always the easier option when it comes to photography.
On the other hand the practical side was a little less complicated but still challenging, I used a scalpel knife and a ruler and unlike photoshop it was much easier to map out and cut the sections of the photo but a little more on the dangerous side. I used the same photo, from the high key shoot, and because the subject is looking to the side I cut the side of their head so it looked as if their pieces are flying away.
This project overall proved to me how much precision and planning is needed to get the idea in your head to the actual final outcome and how many changes are often needed to be made if hopes are held a little too high. It also showed me that it is a lot more than just cutting and pasting to create a successful collage.
Comments
Post a Comment